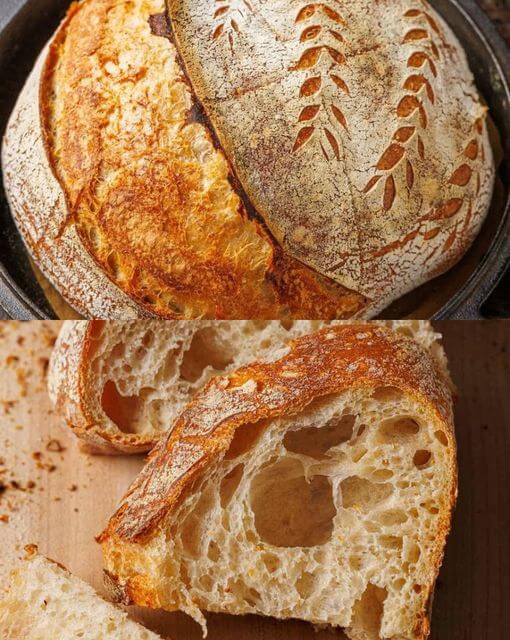
Bake the Perfect Sourdough Bread: A Step-by-Step Guide
Creating the perfect sourdough bread requires patience and precision, but the result is well worth the effort. Follow this detailed guide to bake a delicious loaf of sourdough bread at home.
Ingredients
- 14.1 oz (400 g) bread flour or all-purpose flour, plus more to dust
- 1.9 oz (55 g) rye flour, or whole wheat or bread flour
- 0.35 oz (10 g) fine sea salt
- 12.2 oz (345 g) filtered water, or dechlorinated water or spring water, luke-warm up to 85˚F (29.4˚C)
- 3.5 oz (100 g) active sourdough starter
- Rice flour, optional for dusting the bread basket
Instructions
Step 1: Feed Your Sourdough Starter
Feed your sourdough starter 1 or 2 times before making your sourdough bread, depending on its health. For a single loaf, mix 50g of starter with 50g of bread flour and 50g of lukewarm water. Cover with a loose-fitting lid and let it rise at room temperature until more than doubled in size, about 4-6 hours.
Step 2: Make the Dough
- In a large mixing bowl, whisk together the bread flour, rye flour, and salt.
- Add the water and sourdough starter to the flour mixture. Stir together with a wooden spoon, then use your hand to thoroughly mix, pinching the dough to ensure it’s well combined. The dough will be very sticky.
- Scrape down the bowl, cover with a clean kitchen towel, and let the dough rest at room temperature for 4 hours in a warm spot (bulk fermentation).
Step 3: Bulk Fermentation Stage
- After every hour, perform a round of “stretch and fold”:
- With wet hands to prevent sticking, gently lift up one side of the dough and stretch it upwards, then fold it over onto itself. Rotate the bowl a quarter turn and continue to stretch and fold about 3 more times or until the dough resists pulling.
- Keep the bowl covered with a towel between your stretch and fold rounds. After 4 hours, you’ll stretch and fold the dough for the fourth and final time to tighten it up.
Step 4: Shape the Loaf
- Turn the dough out onto a lightly floured surface (cut it in half if you’ve doubled the dough for 2 loaves).
- With floured hands, gently stretch out the dough then shape it to match the shape of your banneton (bread basket) and pot.
- Turn the dough seam-side down, cover it with a towel, and let it ‘bench rest’ for 20 minutes.
Step 5: Tighten the Dough
- If the dough loosens up too much during the bench rest and loses shape, gently re-shape it to tighten the loaf.
- With floured hands, cup your hands around the sides of the dough and tuck the sides underneath. Pull the dough down the counter towards you in a circular motion to tighten up the shape.
Step 6: Cold Fermentation
- Transfer the dough seam-side up into your floured banneton.
- Cover with a tea towel and refrigerate for at least 8 hours or up to 48 hours.
Step 7: Preheat the Oven
- At least 30 minutes before baking, set the Dutch oven or combo cooker into your oven (set your pizza stone on the bottom rack if using) and preheat the oven to 500°F (260°C).
Step 8: Score Your Bread
- Turn the bread out into a parchment-lined combo cooker or onto a sheet of parchment paper if using a Dutch Oven.
- Using a bread lame, score the bread starting at the base on one side, keeping a 45-degree angle and making a 1/4 to 1/2″ deep crescent shape from one side to the other.
- If using a Dutch Oven, use the parchment to transfer your dough into the pot.
Step 9: Bake the Bread
- Using oven mitts, cover the pot with the hot lid and place it into the oven. Immediately reduce the heat to 450°F (230°C) and bake for 20 minutes covered.
- Remove the lid and bake for another 20-25 minutes uncovered, or until it reaches your desired color.
Notes
- Feeding Your Starter: Whether you store your starter at room temperature or in the refrigerator, see our post on how to feed sourdough starter for a detailed tutorial.
- Water Quantities: You may need to experiment with how much water you need for the dough. If you live in a high-humidity area, use less water.
- Shaping the Dough: For a round loaf, starting at the top, fold the dough onto itself, gently pressing down in the center. Give it a slight turn and fold over the next section, repeating until all 4 sides are folded in. For an oval banneton, alternate folding in the sides from left to right all the way down, then tightly roll the dough from top to bottom.
- Baking Tips: Set the top rack in the middle of the oven and the bottom rack right below it. If you have a pizza stone, set it on the bottom rack to keep the bottom of your bread from turning too dark.
- Banneton Maintenance: Before using, season the liner or the basket itself (whichever you choose to use). To do this, spray it lightly with water and use flour to generously cover. Shake and scrape out the extra with a spatula. Once you use the bread basket, be sure to dry it out completely and then scrape the extra flour from the basket before storing it. Rice flour works best, but you can use all-purpose or bread flour.

