Chocolate Apple Dessert: A Guilt-Free, Sugar-Free Treat
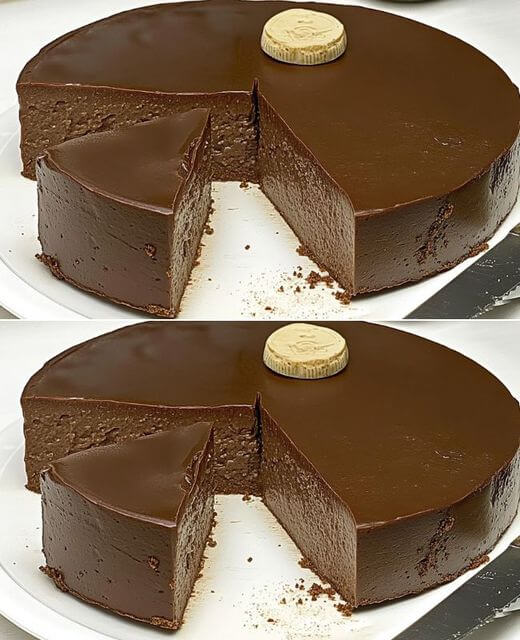
Indulge your sweet tooth without the guilt with this Chocolate Apple Dessert a naturally sweet, sugar-free treat that’s as wholesome as it is delicious. Juicy, crisp apples are paired with rich, velvety chocolate, creating a perfect balance of fruity freshness and decadent flavor. This simple yet satisfying dessert is ideal for healthy snacking, light after-dinner indulgence, or even a fun party treat.
Preparation Time: 10 minutes
Cooking/Chilling Time: 15 minutes (if chilled)
Total Time: 25 minutes
Ingredients
6 small or 4 medium-sized sweet apples (such as Gala, Fuji, or Honeycrisp)
Water (enough to cover the apples in the saucepan)
250g (8.8 oz) sugar-free chocolate (dark or milk chocolate, depending on preference)
6-inch (15 cm) baking dish
Step-by-Step Instructions
Prepare the Apples
Peel, Core, and Chop the Apples: Start by peeling the apples to remove the skin, then core them and chop them into medium-sized chunks. The apples will cook faster when chopped into smaller pieces, ensuring an even texture when blended.
Cook the Apples
Simmer the Apples: Place the chopped apples in a medium saucepan and cover them with enough water to submerge the pieces. Bring the water to a boil, then reduce the heat to a simmer. Allow the apples to cook for about 15-20 minutes, or until they are tender and soft. You can test this by piercing the apples with a fork—if they easily break apart, they’re ready.
Drain and Blend: Once the apples are tender, drain the water and transfer the apples to a blender or food processor. Blend until the apples form a smooth purée with no lumps. Set the purée aside to cool slightly.
Melt the Chocolate
Melt the Sugar-Free Chocolate: While the apple purée is cooling, melt 250g of sugar-free chocolate using a double boiler. If you don’t have a double boiler, you can melt the chocolate in the microwave by heating it in 30-second intervals, stirring after each interval to ensure the chocolate doesn’t burn. Continue until the chocolate is fully melted and smooth.
Combine the Apples and Chocolate
Mix the Purée with Chocolate: Once both the apple purée and melted chocolate are ready, combine them in a mixing bowl. Stir the mixture thoroughly until the chocolate is fully incorporated with the apple purée. The mixture should be smooth, creamy, and uniform in color.
Pour into the Baking Dish
Transfer to a Baking Dish: Pour the chocolate-apple mixture into a 6-inch (15 cm) baking dish, spreading it out evenly to create a smooth surface. The size of the baking dish ensures the dessert will be thick enough to hold its shape once set.
Cool and Set
Cool at Room Temperature: Allow the dessert to cool at room temperature for about 20-30 minutes.
Refrigerate: After it has cooled down, transfer the baking dish to the refrigerator. Let it chill for 2-3 hours or until fully set. This chilling time allows the dessert to firm up, making it easier to slice and serve.
Serve and Enjoy
Slice and Serve: Once the dessert is set, remove it from the refrigerator and slice it into even pieces. You can serve the slices as-is or pair them with fresh berries or a dollop of whipped cream for added flavor.
Nutritional Information (Per Serving)
Servings: 6-8 slices (depending on how it’s cut)
Calories: 180 kcal
Total Fat: 12g
Saturated Fat: 7g
Carbohydrates: 18g
Sugars: 10g (from the apples)
Protein: 3g
Fiber: 3g
Tips for the Perfect Chocolate Apple Dessert:
Choosing the Right Apples:
Use sweet apples like Gala, Fuji, or Honeycrisp for a naturally sweet purée. If you prefer a slightly tangy taste, mix in a tart apple variety like Granny Smith.
Optional Add-Ins:
For extra flavor, you can add a pinch of cinnamon or nutmeg to the apple purée before mixing it with the chocolate. This will give the dessert a warm, spiced flavor.
Serving Suggestion:
Serve this dessert with a sprinkle of crushed nuts or a dusting of cocoa powder for an elegant finish.

