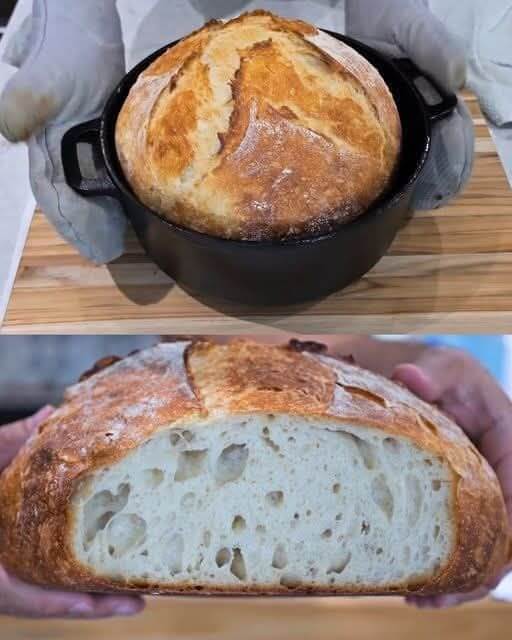
Dutch Oven Bread Recipe
Ingredients:
- 1.5 tsp Activated yeast
- 4 tsp Sugar
- 2 tsp Vinegar
- 3 cups (710ml) Warm water (110°F)
- 2 tsp Salt
- 6 cups All-purpose or bread flour
- All-purpose flour: 720-750g
- Bread flour: 780-810g
Directions:
- Activate the Yeast:
- In a small bowl, combine the yeast, sugar, vinegar, and warm water. Stir gently and let the mixture sit for 10 minutes until it becomes frothy and bubbly.
- Prepare the Dry Ingredients:
- In a large mixing bowl, combine the salt and flour. Stir well to ensure the salt is evenly distributed throughout the flour.
- Mix the Dough:
- Pour the activated yeast mixture into the flour mixture. Stir with a wooden spoon or dough whisk until all the flour is incorporated and the dough comes together. The dough should be slightly sticky, and no dry flour should remain.
- Activate the Yeast:
- First Rise:
- Cover the bowl with a clean kitchen towel and let the dough rest in a warm place for 2 hours. This allows the dough to rise and develop its flavor.
- Fold the Dough:
- After the first rise, gently fold all sides of the dough toward the center to release any air and strengthen the dough’s structure. This will help create a better crumb.
- Second Proof:
- Cover the bowl again and let the dough proof for an additional 1 hour. This second rise will help the dough develop a nice, airy texture.
- First Rise:
- Prepare the Work Surface:
- Generously flour a work surface and your hands. Turn the dough out onto the floured surface and shape it into a round or oval loaf. Be careful not to deflate the dough too much.
- Preheat the Dutch Oven:
- While the dough is proofing, place your Dutch oven with the lid on in the oven and preheat it to 450°F (230°C).
- Bake the Bread:
- Once the dough has finished proofing, carefully transfer it into the preheated Dutch oven. You can use parchment paper for easier transfer and to prevent sticking.
- Cover with the lid and bake for 40 minutes.
- Finish the Crust:
- After 40 minutes, remove the lid and parchment paper (if used). Bake for an additional 3-5 minutes to allow the bread to develop a golden, crispy crust.
- Prepare the Work Surface:
- Cool the Bread:
- Remove the bread from the Dutch oven and transfer it to a wire rack to cool completely before slicing.
Serving Suggestions:
- Slice and serve with a pat of butter or olive oil for a simple, comforting snack.
- Use it to make delicious sandwiches with your favorite fillings.
- Serve alongside a hearty soup or stew for a filling meal.
- Toast the bread and top with avocado, eggs, or smoked salmon for a tasty breakfast.
- Slice and serve with cheese and charcuterie for a rustic appetizer or picnic treat.
Cooking Tips:
- Ensure that the water is warm (110°F) for activating the yeast. Water that’s too hot or too cold can prevent the yeast from properly activating.
- If your dough is too sticky, add a little more flour, but be careful not to overdo it, as too much flour can result in a dense loaf.
- If you don’t have a Dutch oven, you can use a regular baking sheet, but a Dutch oven creates a steam environment that helps develop the bread’s crispy crust.
- Be patient with the rising times. A slow rise enhances the flavor and texture of the bread.

