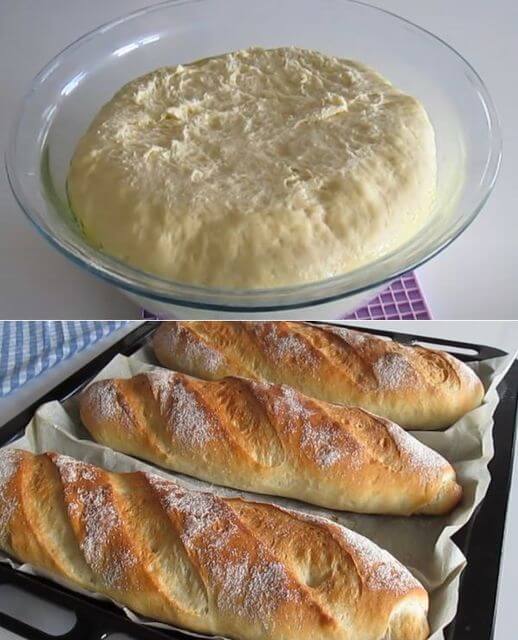
Homemade Bread Recipe: So Easy, You’ll Never Buy Bread Again!
Ingredients (Makes 3 Small Loaves)
- 4 tablespoons (60 ml) olive oil
- 1 tablespoon (10 g) dry yeast
- 1 teaspoon salt
- 1 1/3 cups (320 ml) warm water (about 110°F/45°C)
- 4 3/4 cups (570 g) plain flour
Nutritional Information (Per Slice, Based on 12 Slices Per Loaf)
- Calories: 130
- Protein: 3 g
- Carbohydrates: 22 g
- Dietary Fiber: 1 g
- Sugars: 0 g
- Fat: 3 g
- Saturated Fat: 0.5 g
- Sodium: 100 mg
Step-by-Step Instructions
Step 1: Prepare the Dough
- Combine Ingredients: Add the flour to a large mixing bowl. Pour in the warm water, olive oil, dry yeast, and salt. The warm water helps activate the yeast, starting the rising process.
- Mix and Knead: Use a spoon or your hands to mix the ingredients until they start to come together. Then, transfer the mixture to a lightly floured surface and knead the dough by hand for about 10 minutes. The dough should become smooth, elastic, and slightly tacky but not sticky.
- Kneading Tips: To knead, fold the dough in half, push down and away with the heels of your hands, then rotate and repeat. This process develops the gluten, which gives the bread its structure.
Step 2: Let the Dough Rise
- First Rise: Place the dough in a clean, lightly oiled bowl. Cover the bowl with a clean cloth or plastic wrap and set it in a warm place. Let the dough rise for about an hour, or until it has doubled in size.
- Rising Tips: A warm, draft-free place like a turned-off oven or a microwave with a cup of hot water works well for rising. The dough should look puffy and airy when it’s ready.
Step 3: Shape the Dough
- Shape into a Cylinder: After the dough has risen, gently punch it down to release the gas. Transfer it to a lightly floured work surface and shape it into a cylinder.
- Divide and Form Loaves: Divide the cylinder into three equal parts using a knife or bench scraper. Shape each part into a loaf by folding the edges toward the center, creating tension on the surface.
- Prepare for Baking: Place the loaves seam-side down on a baking sheet lined with baking paper. Make a few shallow cuts on the top of each loaf using a sharp knife or razor blade—this allows steam to escape and helps the bread expand in the oven. Sprinkle with a little flour for a rustic look.
Step 4: Bake the Bread
- Preheat the Oven: Preheat your oven to 200°C (392°F).
- Bake: Place the baking sheet with the loaves in the oven and bake for about 30 minutes, or until the bread is golden brown and sounds hollow when tapped on the bottom.
- Baking Tips: For an extra crispy crust, place a small pan of water in the oven while baking to create steam, or spray the inside of the oven with water before closing the door.
Step 5: Cool and Serve
- Cool: Remove the bread from the oven and let it cool on a wire rack. Cooling on a rack helps keep the crust crisp while allowing moisture to escape.
- Serve: Slice and serve your delicious homemade bread with your favorite toppings like butter, jam, cheese, or dips.
Tips for Perfect Homemade Bread
- Check Dough Consistency: The dough should be soft and slightly tacky but not too sticky. If it’s too dry, add a tablespoon of water at a time. If too wet, add a little more flour.
- Patience with Rising: Allowing the dough to rise fully gives the best texture and flavor. Don’t rush this step; it’s key to achieving that light and fluffy bread.
- Storage: Store leftover bread in a paper bag at room temperature for up to 3 days. For longer storage, freeze slices in a resealable bag and toast from frozen.

