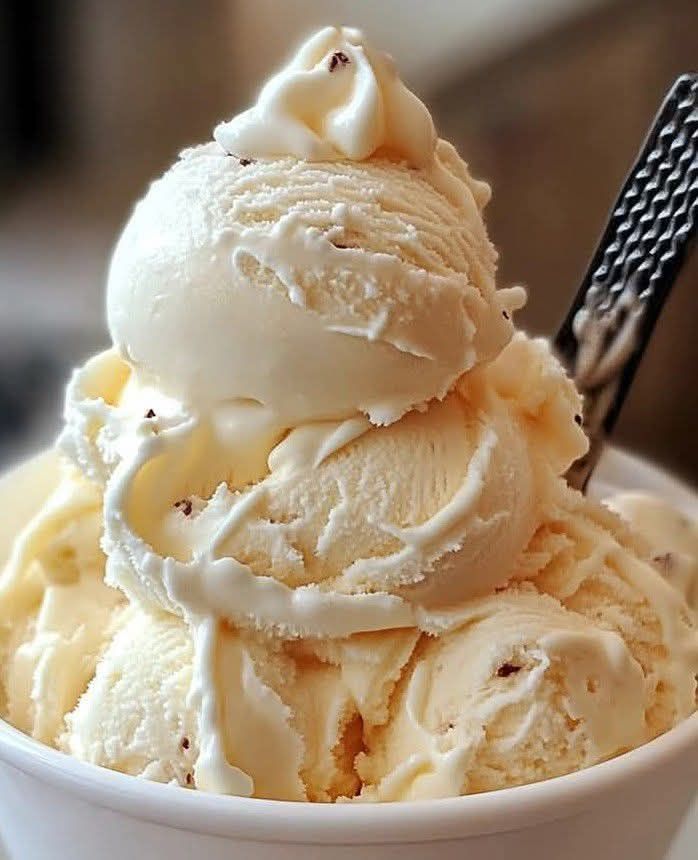
🍦 Homemade Vanilla Ice Cream Recipe
Description
This classic homemade vanilla ice cream is rich, creamy, and full of natural vanilla flavor. Made with simple ingredients, it’s the perfect frozen treat for summer or any time of year. Whether enjoyed on its own, topped with fresh fruit, or served alongside a warm dessert, this ice cream is sure to be a hit!
Ingredients
For the Ice Cream Base:
- 2 cups heavy cream
- 1 cup whole milk
- ¾ cup granulated sugar
- 1 tbsp pure vanilla extract (or vanilla bean seeds for extra richness)
- 4 egg yolks
- ¼ tsp salt
Optional Add-ins:
- ½ cup crushed cookies, chocolate chips, or fruit
- 1 tbsp rum or vodka (helps prevent ice crystals)
Instructions
1. Heat the Base
- In a saucepan over medium heat, combine the milk, 1 cup of heavy cream, sugar, and salt. Stir until the sugar dissolves.
- If using a vanilla bean, split it open, scrape the seeds into the mixture, and add the pod. Let it steep for 5 minutes, then remove the pod.
2. Temper the Eggs
- In a separate bowl, whisk the egg yolks until smooth.
- Slowly pour ½ cup of the warm milk mixture into the yolks while whisking (this prevents scrambling).
- Pour the egg mixture back into the saucepan and cook over low heat, stirring constantly, until thickened (170°F or coats the back of a spoon, about 5 minutes).
3. Strain & Chill
- Pour the custard through a fine-mesh strainer into a clean bowl.
- Stir in the remaining 1 cup of heavy cream and the vanilla extract.
- Cover and refrigerate for at least 4 hours (preferably overnight) until completely chilled.
4. Churn & Freeze
- Pour the chilled mixture into an ice cream maker and churn according to the manufacturer’s instructions (typically 20-25 minutes).
- Transfer to an airtight container and freeze for at least 2 hours for a firmer texture.
Tips for the Best Ice Cream
✅ Use High-Quality Vanilla – Pure vanilla extract or vanilla bean will give the best flavor.
✅ Chill the Base Properly – Ensure the mixture is cold before churning to improve texture.
✅ Don’t Overchurn – Stop when it reaches a soft-serve consistency; overchurning makes it grainy.
✅ Alcohol Trick – A tablespoon of alcohol (like vodka) keeps the ice cream smooth and prevents iciness.
✅ No Ice Cream Maker? – Freeze in a shallow dish, stirring every 30 minutes until thickened.
Servings & Nutrition
Servings: 6 (½ cup each)
| Nutrient | Amount per Serving |
|---|---|
| Calories | 290 kcal |
| Carbs | 22g |
| Fat | 22g |
| Protein | 4g |
| Sugar | 20g |
(Values are approximate and depend on ingredients used.)
Health Benefits of Homemade Ice Cream
✅ No Preservatives – Fresh and free of artificial stabilizers.
✅ Customizable – Adjust sugar, use alternative milk, or add mix-ins.
✅ Good Source of Calcium – Supports bone health.
✅ Egg Yolks Provide Nutrients – Rich in choline and vitamin D.
Q & A
Q: Can I make this without eggs?
A: Yes! Replace the egg yolks with 1 tbsp cornstarch for a lighter, egg-free version.
Q: How long does homemade ice cream last?
A: It’s best within 2 weeks but can last up to a month in an airtight container.
Q: Can I use non-dairy milk?
A: Yes! Substitute coconut milk, almond milk, or oat milk for a dairy-free version, but the texture may be less creamy.
Q: My ice cream is too hard! What can I do?
A: Let it sit at room temperature for 5-10 minutes before scooping, or add 1 tbsp of alcohol to keep it softer.
Would you like any variations or extra flavor suggestions? 😊

