Perfect No-Knead Bread
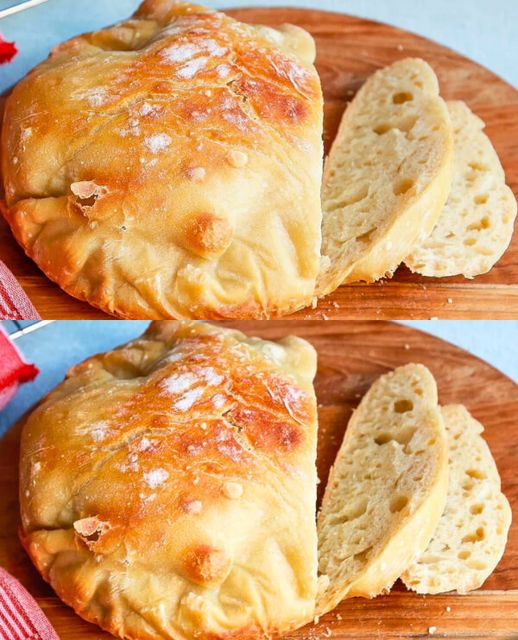
No-knead bread has revolutionized home baking by making it accessible to everyone, regardless of their skill level. This artisanal bread, with its crispy crust and soft, airy interior, is a testament to the beauty of simplicity. Whether you’re a seasoned baker or a novice, this guide will help you create a loaf of bread that’s not only delicious but also visually stunning.
History of No-Knead Bread
The concept of no-knead bread was popularized by Jim Lahey of Sullivan Street Bakery in New York City. His revolutionary method, introduced in the early 2000s, showed that with minimal effort and ingredients, anyone could bake a high-quality loaf of bread at home. The secret lies in the long fermentation process, which allows the dough to develop flavor and texture without the need for extensive kneading.
Ingredients
- 3 1/4 cups all-purpose flour
- 1 1/3 cups lukewarm water
- 1 teaspoon salt
- 1/2 teaspoon dried yeast
- Cast iron pan
- Baking paper
Nutritional Information:
- Calories: 120 per slice
- Protein: 4g
- Carbohydrates: 24g
- Fat: 0.5g
- Fiber: 1g
Step-by-Step Instructions
Mixing the Dough
- Combine the Ingredients: In a large mixing bowl, add 3 1/4 cups of all-purpose flour, 1 teaspoon of salt, and 1/2 teaspoon of dried yeast. Pour in 1 1/3 cups of lukewarm water. Using a wooden spoon, mix all the ingredients until no dry flour remains. The dough will be shaggy and sticky, which is perfect for no-knead bread.
- Initial Fermentation: Cover the bowl with a lid or a clean tea towel. Place the bowl in a warm, draft-free area and let the dough rise for about 12 hours. This long fermentation period allows the yeast to work slowly, developing deep, complex flavors and a chewy texture.
Shaping the Dough
- Prepare the Countertop: After the dough has risen and doubled in size, generously flour your countertop. Gently remove the dough from the bowl using a spatula.
- Folding the Dough: Lightly flour your hands and the surface of the dough. Fold the dough in half a few times to create layers. This step helps to build structure within the dough.
- Forming the Dough Ball: Shape the dough into a ball by tucking the edges underneath. Place the dough ball on a piece of baking paper. Sprinkle a little flour on top and cover it with a clean tea towel. Let the dough rise for another 2 hours.
Baking the Bread
- Preheat the Oven and Pan: About 30 minutes before the end of the second rise, preheat your oven to 250°C (482°F) with the cast iron pan inside. The high heat is crucial for creating a crusty exterior.
- Transfer the Dough: Carefully remove the hot cast iron pan from the oven. Using the baking paper, lift the dough and place it into the pan. Be cautious, as the pan will be extremely hot.
- Bake with the Lid On: Place the lid on the pan and return it to the oven. Lower the oven temperature to 200°C (392°F) and bake for 30 minutes. The steam trapped inside the pan helps create a crisp crust.
- Finish Baking without the Lid: After 30 minutes, remove the lid and bake for an additional 15 minutes. This final step ensures a golden-brown crust and fully baked interior.
- Cooling the Bread: Once baked, carefully remove the bread from the pan and let it cool on a wire rack. Cooling allows the bread to set and makes slicing easier.
Tips for the Best No-Knead Bread
- Use Fresh Yeast: Ensure your yeast is fresh and active for the best rise.
- Water Temperature: Lukewarm water helps activate the yeast without killing it. Aim for a temperature between 100-110°F (38-43°C).
- Fermentation Time: The longer the fermentation, the better the flavor. Don’t rush this process.
- Flour Variety: Experiment with different types of flour, such as whole wheat or rye, for varied flavors and textures.
- Steam for Crust: If you don’t have a lid for your pan, place a shallow pan of water in the oven to create steam.
Conclusion
Creating no-knead bread is a rewarding experience that brings the art of baking into your kitchen with minimal effort. This method not only produces a delicious loaf but also instills a sense of accomplishment. With its crunchy crust and tender crumb, this bread is perfect for any occasion, from a simple breakfast toast to an elegant dinner side.

