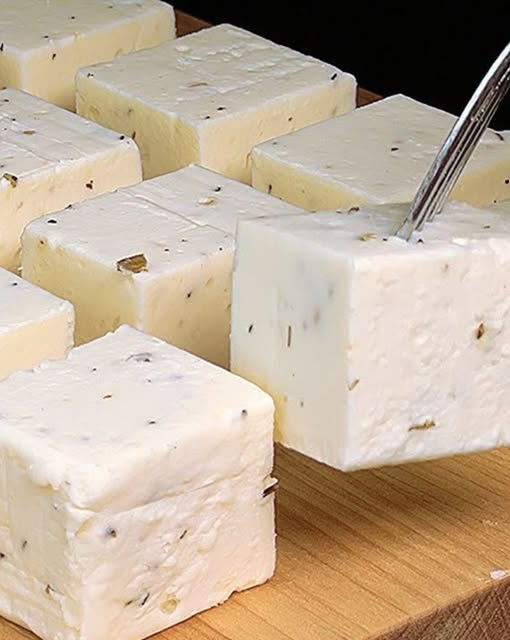
Quick and Delicious Cheese in Just 6 Minutes
With few ingredients and little work, this cheese recipe is a fast and simple method to produce fresh cheese at home. You can make a tasty, creamy cheese with simply milk and vinegar that you can spread, crumble, or add to your favorite foods. This easy recipe is perfect for hectic days or when you want to experience handmade cheese without the hassle since it only takes six minutes to create.
Ingredients
Milk: 1.5 liters (6 1/3 cups), preferably full-fat for a richer cheese
Vinegar: 2 tablespoons (white or apple cider vinegar works well)
Butter: 50 g (1.8 oz), melted (optional for extra creaminess)
Parsley: 1 tablespoon, finely chopped (optional for added flavor)
Salt: To taste
Step-by-Step Instructions
Step 1: Heating the Milk
Pour 1.5 liters of milk into a large pot.
Place the pot over medium heat and stir occasionally to prevent the milk from burning.
Heat the milk to just below boiling, around 6 minutes, or until it’s hot but not boiling. This is key to ensure proper curdling without overcooking the milk.
Step 2: Adding the Vinegar
Remove the pot from heat when the milk is hot.
Add 2 tablespoons of vinegar to the milk, stirring constantly.
Watch as the milk begins to curdle, separating into solid curds and liquid whey.
Continue stirring for another minute to ensure the vinegar is evenly distributed and the curdling process is complete.
Step 3: Straining the Curd
Prepare a fine mesh strainer lined with cheesecloth or a clean kitchen towel.
Slowly pour the curdled milk into the strainer, allowing the whey to drain away from the curds.
Let the curds drain for a few minutes, ensuring as much whey as possible is removed. The more whey you remove, the firmer your cheese will be.
Step 4: Improving Taste and Texture
Transfer the drained curds to a mixing bowl.
Add the melted butter to the curds, mixing thoroughly to incorporate. The butter adds a velvety texture and richer flavor to the cheese.
Season with salt to taste. You can also add herbs like parsley or other spices to customize the flavor of your cheese.
Step 5: Shaping the Cheese
Shape the cheese according to your preference. For a firmer cheese, transfer the curd to a mold or small container, cover with a cloth, and press down with a weight for at least 30 minutes at room temperature.
For a softer, spreadable cheese, you can skip pressing and enjoy it immediately.
Step 6: Serve
Your homemade cheese is now ready to enjoy! Cut, spread, or crumble it into your favorite dishes.
Serve it with bread, in salads, or simply on its own, garnished with herbs or a drizzle of olive oil.
Tips for the Perfect Homemade Cheese
Choose Full-Fat Milk: For the best texture and flavor, use full-fat milk. Lower-fat versions will work but result in a less creamy cheese.
Adjust the Firmness: For firmer cheese, press the curds longer or refrigerate after pressing. For softer cheese, use less pressure and less draining time.
Flavor Variations: Try adding fresh herbs, garlic, or spices like black pepper or paprika for added flavor.
Enjoy Your Homemade Cheese
This quick and easy Cheese is perfect for anyone who loves simple, homemade food. Whether you prefer it plain or jazzed up with herbs and spices, this cheese is a versatile addition to your kitchen repertoire. It’s delightful on its own, as a snack, or as a component in other dishes. Give it a try and enjoy the satisfaction of making your own fresh cheese at home!

