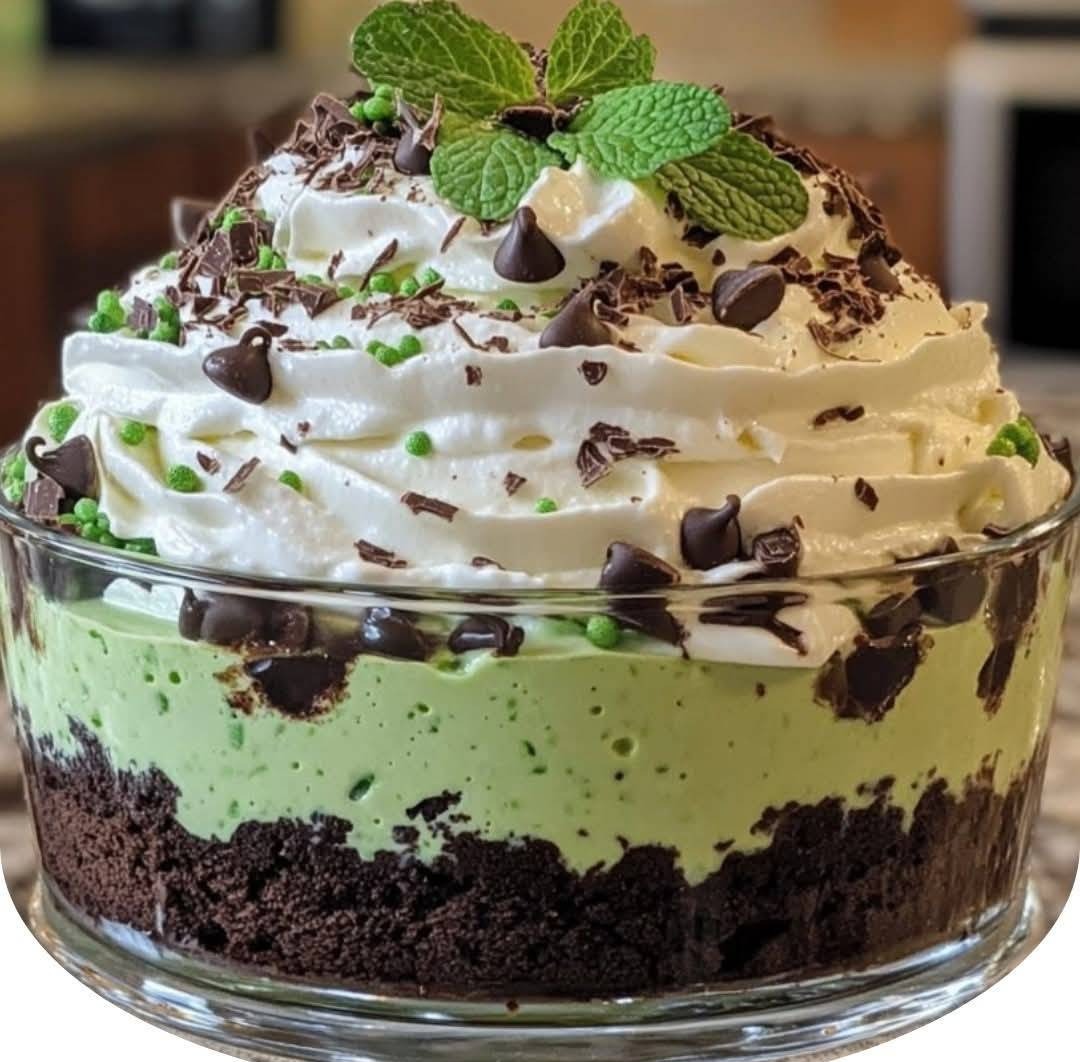
St. Patrick’s Day Brownie Trifle Recipe
Indulging in festive sweets that not only satiate your sweet tooth but also perfectly embody the holiday mood is ideal on St. Patrick’s Day. This St. Patrick’s Day Brownie Trifle is a delicious and aesthetically pleasing dessert that will wow your guests with its layers of rich brownies, silky mint chocolate pudding, and fluffy whipped cream. This recipe is a great complement to any St. Patrick’s Day celebration because brownies and trifles are common dessert options for parties and get-togethers. This recipe is ideal if you want to make a dessert that is both aesthetically pleasing and delicious. Additionally, trifles are renowned for their simplicity and adaptability, which let you make a dessert that will wow guests with little work.
Ingredients
For the Brownies:
1 box of brownie mix (plus ingredients required by the box, such as eggs, oil, and water)
For the Whipped Cream Layer:
2 cups heavy cream
1/4 cup powdered sugar
1 teaspoon vanilla extract
For the Mint Pudding Layer:
1 package (3.9 ounces) of chocolate pudding mix
2 cups cold milk
1 teaspoon peppermint extract
A few drops of green food coloring
For Garnish (Optional):
Crushed mint chocolate candies
Chocolate shavings
Green sprinkles
Instructions
Bake the Brownies
Start by preheating your oven according to the instructions on the brownie mix box. Prepare the brownie batter by following the package directions, which typically require adding eggs, oil, and water. Pour the batter into a greased baking pan and bake as directed. Once baked, allow the brownies to cool completely. After they’ve cooled, cut them into small cubes. The size of the brownie pieces will determine how dense or light the trifle feels, so consider cutting them into bite-sized pieces for the best texture.
Prepare the Mint Chocolate Pudding
While the brownies are cooling, prepare the mint chocolate pudding. In a medium-sized mixing bowl, whisk together the chocolate pudding mix and cold milk until the mixture thickens, which should take about 2 minutes. Add the peppermint extract and a few drops of green food coloring to achieve a festive green hue. Adjust the food coloring based on how vibrant you want the green color to be. Place the pudding in the refrigerator for about 10 minutes to set.
Make the Whipped Cream
In a large mixing bowl, combine the heavy cream, powdered sugar, and vanilla extract. Use a hand mixer or stand mixer to whip the mixture on medium-high speed until stiff peaks form. Be careful not to over-whip, as this can cause the cream to become grainy. The whipped cream should have a smooth, fluffy texture that holds its shape.
Assemble the Trifle
To assemble the trifle, start by placing a layer of brownie cubes at the bottom of a large glass trifle dish or individual serving glasses. Follow with a layer of mint chocolate pudding, spreading it evenly over the brownies. Next, add a layer of whipped cream, ensuring it covers the pudding completely. Repeat the layers until you run out of ingredients or the trifle dish is full. Finish with a final layer of whipped cream.
Garnish and Chill
To enhance the festive look and flavor, garnish the top of the trifle with crushed mint chocolate candies, chocolate shavings, and green sprinkles. Place the trifle in the refrigerator for at least two hours to allow the flavors to meld and the dessert to set properly. Serving the trifle chilled ensures the layers hold together well and the flavors are at their peak.
Tips for the Perfect Brownie Trifle
Brownie Texture – If you prefer a chewy texture, bake the brownies for a few minutes less than the box instructions suggest. For a more cake-like texture, bake them for a few minutes longer.
Peppermint Flavor Strength – Adjust the amount of peppermint extract according to your taste. Too much can overpower the dessert, while too little might not provide enough of the minty kick.
Layering Technique – For a visually appealing trifle, use a piping bag to add the pudding and whipped cream layers. This helps keep the layers clean and distinct.
Serving Size – If you’re serving a large crowd, consider assembling the trifle in a large glass bowl. For smaller gatherings, use individual glasses or mason jars for a personal touch.
Add Texture – Adding a crunchy element like chopped nuts or chocolate chips between layers can create a delightful contrast to the creamy pudding and whipped cream.
Variations
Gluten-Free Option – Use a gluten-free brownie mix to accommodate guests with dietary restrictions.
Dairy-Free Option – Substitute coconut cream for heavy cream and almond milk for regular milk to make the trifle dairy-free.
Alcohol-Infused Version – Add a splash of peppermint schnapps or Irish cream to the whipped cream or pudding for an adult-friendly twist.
Extra chocolate For an even more decadent trifle, mix mini chocolate chips into the pudding or sprinkle them between layers.
Mint Oreo Addition – Crushed Mint Oreos can add another layer of flavor and texture when sprinkled between the brownie and pudding layers.
Storage and Make-Ahead Instructions
Refrigeration – The trifle can be prepared up to 24 hours in advance. Keep it covered with plastic wrap or a lid to prevent the whipped cream from absorbing any odors from the refrigerator.
Leftovers – Store leftover trifle in an airtight container in the refrigerator for up to 3 days. Keep in mind that the brownies may soften over time as they absorb moisture from the pudding and whipped cream.
Freezing – While you can freeze brownies and whipped cream separately, it’s best to avoid freezing the assembled trifle as the pudding and whipped cream may separate when thawed.

