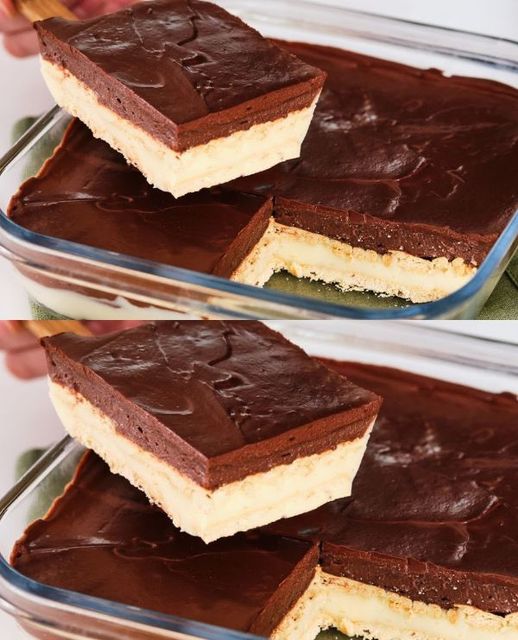
This is the Best Thing I’ve Ever Eaten: Dessert in Minutes, No Oven, No Condensed Milk!
Who doesn’t love a delightful dessert, especially when it’s quick to make and requires no oven? If you’re craving something sweet but don’t want to spend hours in the kitchen, then this recipe is for you! With just a few simple ingredients and easy steps, you can whip up a scrumptious treat that will leave you wanting more. Let’s dive into how to make this mouthwatering dessert that’s sure to become your new favorite!
Ingredients
- 3.5 ounces of sugar-free biscuits
- 1 3/4 cups of milk
- 3 ounces of chocolate
- 3 tablespoons plus 1 teaspoon of light cream
- 3 tablespoons of stevia sweetener (or alternatively 5.5 tablespoons of normal sugar)
- 2 egg yolks
- 1 ounce of corn starch
- 1 ounce of butter
- 0.5 ounces of cocoa
Preparation Steps
Now, let’s dive into the step-by-step process of creating this delectable dessert:
Layering the Biscuits
Begin by placing a layer of sugar-free biscuits in a 16x16cm square glass baking dish. This will serve as the base of your dessert. Set the dish aside while you prepare the creamy filling.
Making the Creamy Filling
In a saucepan, combine the egg yolks and stevia sweetener (or sugar). Whisk until smooth, then add the corn starch and milk. Stir continuously over medium heat until the mixture begins to bubble and thicken, which should take about 1-2 minutes. Next, add the butter to the mixture, allowing it to melt completely. Once melted, remove the saucepan from the heat.
Adding the Cocoa Layer
Pour half of the creamy filling over the layer of biscuits in the baking dish, ensuring that it covers them evenly. Then, add another layer of biscuits on top. To the remaining creamy filling, add the cocoa powder and mix well. Pour this cocoa mixture over the second layer of biscuits, spreading it evenly across the dish.
Garnishing with Chocolate Cream
In a microwave-safe bowl, heat the chocolate until melted. Stir in the light cream until smooth, creating a rich chocolate cream. Pour this chocolate cream over the cocoa layer in the baking dish, spreading it evenly to cover the surface of the dessert.
Chilling the Dessert
Place the prepared dessert in the refrigerator and let it chill for at least 30 minutes. This will allow the layers to set and the flavors to meld together, resulting in a perfectly indulgent treat.
Serving Suggestions
Once chilled, remove the dessert from the refrigerator and serve it to your eager guests. Whether enjoyed on its own or paired with a scoop of vanilla ice cream, this dessert is sure to impress with its decadent layers and rich flavors.
Conclusion
In conclusion, this dessert is a game-changer for anyone with a sweet tooth and limited time. With just a handful of ingredients and simple preparation steps, you can create a masterpiece that rivals any bakery treat. So why wait? Try this recipe today and experience the joy of indulging in the best thing you’ve ever eaten!
