Unveiling Bakers’ Best-Kept Secrets: My Grandfather’s Wisdom Revealed
Ingredients
- Warm Water: 1 2/3 cups (400 ml)
- Sugar: 2 teaspoons
- Dry Yeast: 8 grams
- Wheat Flour: 4 cups (500 grams)
- Salt: 2 teaspoons
Instructions
1. Activating the Yeast
The journey to perfect bread begins with activating the yeast, a crucial step to ensure your bread rises beautifully. Start by combining 100 ml of warm water (from the total 400 ml), 2 teaspoons of sugar, 8 grams of dry yeast, and a small pinch of wheat flour in a mixing bowl. The sugar helps feed the yeast, while the small amount of flour gives it something to start working with.
Stir the mixture until the yeast dissolves and let it sit for about 20 minutes. During this time, the yeast will begin to wake up and start bubbling—this is a sign that it’s ready to work its magic. If the yeast doesn’t become bubbly, it might be inactive, and you’ll need to start over with fresh yeast.
2. Mixing the Dough
Once your yeast is fully activated and bubbly, it’s time to bring everything together. Sift 4 cups (500 grams) of wheat flour into a large mixing bowl. Sifting helps aerate the flour, making the dough lighter and more manageable.
Gradually pour the activated yeast mixture into the flour, mixing quickly with your hands or a sturdy spoon. As the mixture starts to come together, slowly add the remaining 300 ml of warm water. Continue stirring until a rough dough forms.
At this point, add 2 teaspoons of salt to the dough. Salt not only enhances the flavor of the bread but also strengthens the gluten network, which is crucial for the bread’s texture. Mix the dough thoroughly to ensure the salt is evenly distributed.
3. Kneading and Resting
Now comes the part where you give your dough some attention—kneading. If you have an electric mixer with a dough hook, knead the dough for at least 5 minutes on medium speed. The dough should be smooth, elastic, and slightly sticky. If you’re kneading by hand, work the dough for about 10 minutes until it reaches the same consistency.
Once kneaded, cover the dough with a clean kitchen cloth and let it rest in a warm place for 20 minutes. This resting period allows the dough to relax and the gluten to develop, which is essential for the bread’s final texture.
4. Shaping the Loaves
After the initial rest, uncover the dough and give it a quick knead to incorporate any air that has formed. Let it rest for another 15 minutes. Repeat this process with wet hands, which helps to prevent the dough from sticking to your hands and keeps it hydrated.
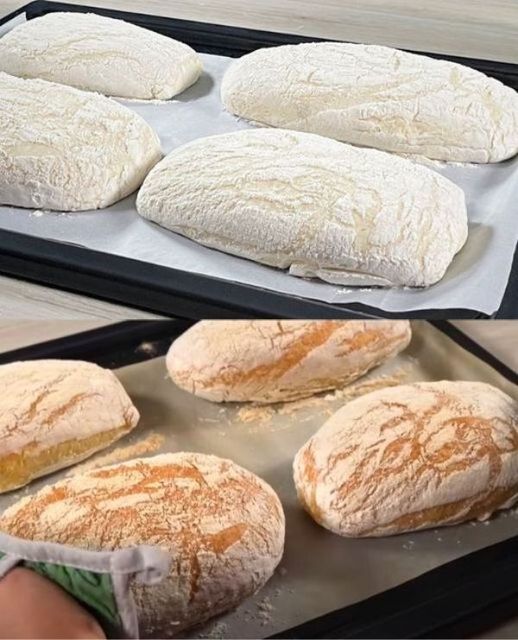
Once the dough has rested for the second time, divide it into three equal parts. Shape each part into a loaf, making sure to form a tight, smooth surface on each loaf. Place the loaves on a baking tray lined with parchment paper, ensuring they have enough space to expand.
Cover the loaves with a cloth and let them rest for a final 15 minutes. This last rise, known as proofing, gives the bread its final lift before baking.
5. Baking the Bread
Preheat your oven to 190°C (375°F). A properly preheated oven is crucial for achieving a good rise and a beautifully browned crust.
Once the loaves have finished proofing, place them in the preheated oven and bake for 30 minutes. You’ll know the bread is done when the crust is golden brown, and the loaves sound hollow when tapped on the bottom. This hollow sound indicates that the bread is fully baked inside.
6. Cooling and Enjoying
When the loaves are done, remove them from the oven and transfer them to a wire rack to cool. It’s important to let the bread cool completely before slicing—this allows the crumb to set, making for neater slices.
Once cooled, slice the bread and enjoy it with your favorite toppings, or savor it as is. The combination of a crisp crust and a tender, flavorful interior is simply irresistible. This bread is perfect for sandwiches, toast, or even as a side with soups and salads.
Nutrition Information
- Servings: 3 loaves (each loaf can be sliced into about 10 slices)
- Calories: Approximately 100 kcal per slice
- Protein: 3g
- Fat: 0.5g
- Carbohydrates: 20g
- Fiber: 1g
- Sugar: 1g
This recipe embodies the simplicity and tradition of homemade bread, passed down through generations. With just a few basic ingredients and some time, you can create a loaf that not only fills your kitchen with the comforting aroma of freshly baked bread but also delivers on taste and texture. Enjoy the fruits of your labor, knowing that you’ve crafted something truly special.

