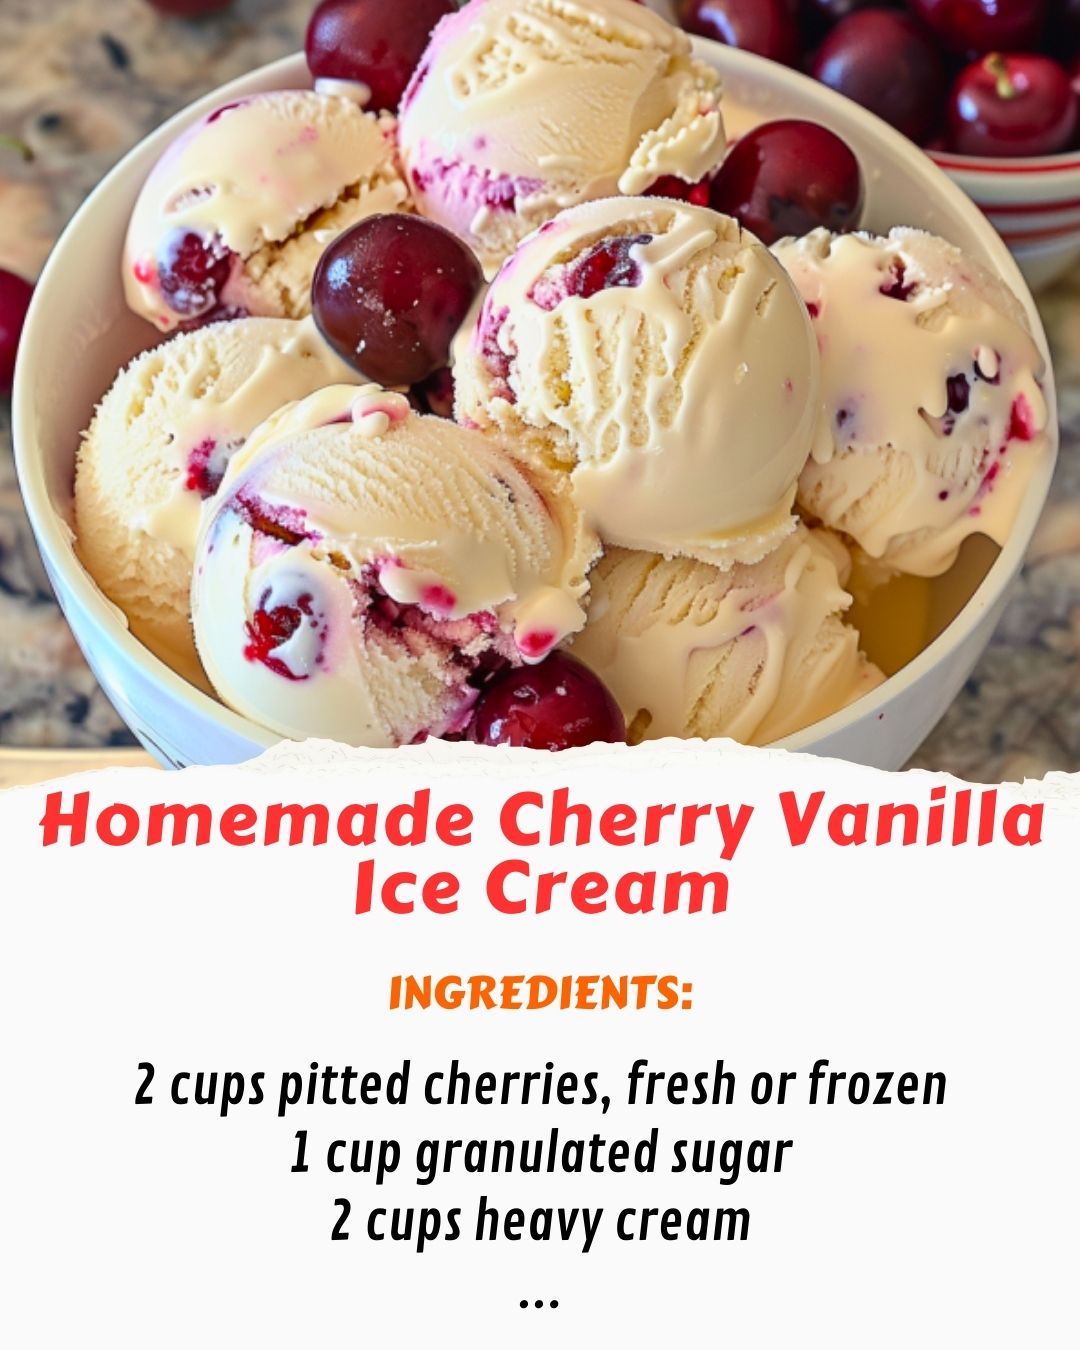
Welcome to our comprehensive guide on creating a delicious and creamy Homemade Cherry Vanilla Ice Cream. This classic flavor combination brings together the sweetness of cherries with the smooth, aromatic taste of vanilla, creating an indulgent dessert perfect for any occasion. In this detailed article, we will walk you through every step of the process, provide helpful tips, and offer variations to suit your preferences. Let’s dive in and create an ice cream that will be a hit with your family and friends!
Introduction to Cherry Vanilla Ice Cream
Cherry Vanilla Ice Cream is a delightful treat that combines the rich flavors of ripe cherries and creamy vanilla. Making ice cream at home allows you to control the ingredients, ensuring a fresh and natural taste. This guide will take you through the steps of making a custard-based ice cream, which provides a smooth and velvety texture.
Ingredients
For this recipe, you will need the following ingredients:
For the Ice Cream Base:
- Heavy Cream (2 cups / 480ml): Provides richness and creaminess.
- Whole Milk (1 cup / 240ml): Balances the cream for a smooth texture.
- Granulated Sugar (3/4 cup / 150g): Adds sweetness.
- Egg Yolks (5 large): Create a rich, custard base.
- Vanilla Bean (1, or 2 teaspoons vanilla extract): Adds pure vanilla flavor.
- Salt (a pinch): Enhances the flavors.
For the Cherry Swirl:
- Fresh or Frozen Cherries (1 1/2 cups / 225g, pitted and chopped): Provides a fruity, sweet-tart flavor.
- Granulated Sugar (1/4 cup / 50g): Sweetens the cherries.
- Lemon Juice (1 tablespoon): Balances the sweetness and enhances the cherry flavor.
- Water (1/4 cup / 60ml): Helps cook the cherries.
Equipment You’ll Need
- Medium Saucepan: For making the custard base.
- Mixing Bowls: Various sizes for mixing ingredients.
- Whisk: For mixing the custard.
- Fine Mesh Sieve: For straining the custard.
- Ice Cream Maker: For churning the ice cream.
- Spatula: For folding in the cherry swirl.
- Airtight Container: For storing the ice cream.
Step-by-Step Instructions
Preparing the Cherry Swirl
- Cook the Cherries: In a medium saucepan, combine the cherries, granulated sugar, lemon juice, and water. Cook over medium heat, stirring occasionally, until the cherries are soft and the mixture has thickened, about 10-15 minutes.
- Blend (Optional): For a smoother swirl, you can blend the cherry mixture using an immersion blender or regular blender until smooth.
- Cool the Cherry Mixture: Transfer the cherry mixture to a bowl and let it cool completely. You can speed up the process by placing it in the refrigerator.
Making the Ice Cream Base
- Heat the Cream and Milk: In a medium saucepan, combine the heavy cream and whole milk. Split the vanilla bean, scrape out the seeds, and add both the seeds and the pod to the saucepan (or add the vanilla extract). Heat the mixture over medium heat until it begins to simmer. Do not let it boil. Remove from heat and let it steep.
- Whisk the Egg Yolks and Sugar: In a mixing bowl, whisk together the egg yolks, granulated sugar, and a pinch of salt until the mixture is pale and thick.
- Temper the Egg Yolks: Slowly pour the warm cream mixture into the egg yolk mixture, whisking constantly to prevent the eggs from curdling.
- Cook the Custard: Return the mixture to the saucepan and cook over low heat, stirring constantly with a wooden spoon or spatula, until the custard thickens and coats the back of the spoon. This should take about 5-7 minutes. Do not let the mixture boil.
- Strain the Custard: Pour the custard through a fine mesh sieve into a clean bowl to remove the vanilla pod and any cooked egg bits.
- Chill the Custard: Cover the custard with plastic wrap, pressing it directly onto the surface to prevent a skin from forming. Refrigerate for at least 4 hours, or overnight, until completely chilled.
Churning the Ice Cream
- Prepare the Ice Cream Maker: Follow the manufacturer’s instructions for your ice cream maker. Ensure the base is completely chilled before churning.
- Churn the Ice Cream: Pour the chilled custard into the ice cream maker and churn according to the manufacturer’s instructions, usually about 20-25 minutes, until it reaches a soft-serve consistency.
- Add the Cherry Swirl: Gently fold in the cooled cherry mixture using a spatula, creating a swirl effect.
Freezing the Ice Cream
- Transfer to a Container: Transfer the churned ice cream to an airtight container, smoothing the top with a spatula.
- Freeze the Ice Cream: Freeze the ice cream for at least 4 hours, or until firm, before serving.
Serving the Ice Cream
- Serve: Scoop the Homemade Cherry Vanilla Ice Cream into bowls or cones and enjoy immediately.
Tips for Perfect Cherry Vanilla Ice Cream
- High-Quality Ingredients: Use fresh, high-quality ingredients for the best flavor and texture.
- Properly Chilled Base: Ensure the custard base is thoroughly chilled before churning for a smoother texture.
- Don’t Overcook the Custard: Cook the custard gently and avoid boiling to prevent curdling.
- Blend the Cherries: For a smoother cherry swirl, blend the cooked cherries before cooling.
Variations and Additions
Cherry Vanilla Ice Cream is versatile and can be customized to suit your tastes. Here are some ideas to inspire you:
Chocolate Cherry Vanilla Ice Cream:
- Additions: Fold in 1/2 cup of mini chocolate chips or shaved chocolate during the last few minutes of churning.
- Serving Suggestion: Serve with a drizzle of chocolate sauce.
Almond Cherry Vanilla Ice Cream:
- Additions: Add 1 teaspoon of almond extract to the custard base and fold in 1/2 cup of toasted almond slivers.
- Serving Suggestion: Serve with a sprinkle of toasted almonds on top.
Boozy Cherry Vanilla Ice Cream:
- Additions: Soak the cherries in 2 tablespoons of kirsch or brandy before cooking for an adult twist.
- Serving Suggestion: Serve with a splash of the same liquor on top.
Vegan Cherry Vanilla Ice Cream:
- Ingredients: Replace the heavy cream and whole milk with full-fat coconut milk and use a vegan custard base made with cornstarch instead of eggs.
- Serving Suggestion: Serve with fresh coconut flakes.
Nutritional Benefits of Cherry Vanilla Ice Cream
While Cherry Vanilla Ice Cream is an indulgent treat, it also offers some nutritional benefits:
Cherries:
- Vitamins and Minerals: Cherries are rich in vitamins C and A, as well as potassium.
- Antioxidants: Cherries contain antioxidants that help protect against cellular damage.
Dairy:
- Calcium: Provides calcium, which supports bone health.
- Protein: Contains protein essential for muscle repair and growth.
Conclusion
Creating Homemade Cherry Vanilla Ice Cream is a delightful culinary experience that results in a dessert both visually appealing and incredibly flavorful. By following this comprehensive guide, you’ll be able to prepare an ice cream that’s perfect for any occasion. Whether you’re making it for a family gathering, a special celebration, or simply to enjoy a delicious and refreshing treat, Cherry Vanilla Ice Cream is sure to impress.
Remember, the key to a successful ice cream is to use fresh, high-quality ingredients and to follow the steps carefully. Don’t be afraid to experiment with different flavors and additions to make the recipe your own. With practice and a bit of creativity, you’ll master the art of making Homemade Cherry Vanilla Ice Cream and enjoy the satisfaction of serving a delicious and memorable dessert.
Happy cooking! If you have any questions or need further assistance, feel free to reach out. We hope this guide inspires you to try new recipes and enjoy the process of cooking. Bon appétit!

