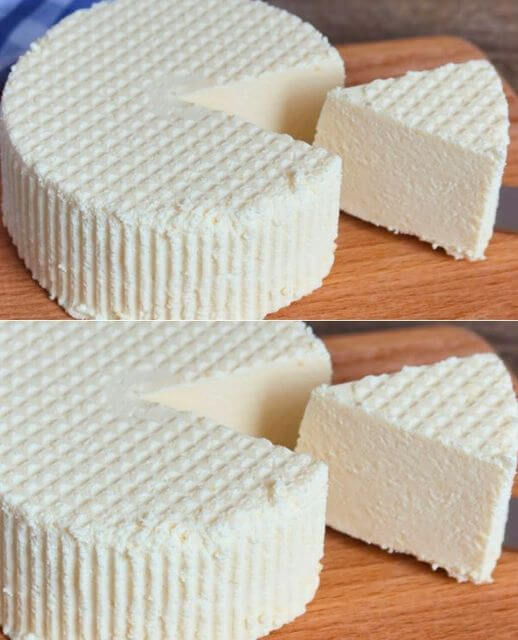
How to Make Fresh Homemade Cheese
Ingredients (Makes About 1 Pound of Cheese)
- 2 quarts (2 liters) raw or fresh unpasteurized milk (cow, goat, or sheep milk)
- 1 teaspoon cheese rennet (liquid or tablet form, dissolved in water as per package instructions)
- 1 teaspoon coarse salt (for flavoring and preservation)
Nutritional Information (Per Ounce)
- Calories: 80
- Protein: 5 g
- Carbohydrates: 1 g
- Fat: 6 g
- Saturated Fat: 4 g
- Cholesterol: 20 mg
- Sodium: 120 mg
- Calcium: 150 mg
Step-by-Step Instructions
Step 1: Heat the Milk
- Pour the milk into a large saucepan.
- Heat the milk over medium heat, stirring occasionally to ensure even heating and prevent the milk from scorching at the bottom of the pan.
- Monitor the temperature with a thermometer until it reaches 70°C (158°F), the pasteurization temperature. This step ensures that any unwanted bacteria are killed, making the milk safe for cheese-making.
Step 2: Cool the Milk
- Once the milk reaches 70°C, remove the pan from the heat.
- Place the pan in a container filled with cold water (like a sink or a large bowl) to cool the milk down to 40°C (104°F), the fermentation temperature. Stir occasionally to help the milk cool evenly.
- Once the milk cools to 40°C, it’s ready for the next step.
Step 3: Add the Rennet
- Remove the saucepan from the cold water bath.
- Add the rennet to the milk, stirring gently to mix thoroughly.
- Cover the pan and wrap it in several cloths to maintain the fermentation temperature. This warmth helps the rennet activate and start the curdling process.
- Let the mixture sit undisturbed for 2 hours. During this time, the milk will set into curds.
Step 4: Cut and Strain the Cheese
- After 2 hours, check the milk—it should have solidified into curds.
- Use a long knife to cut the curds into cubes (about 1/2 inch squares). This step helps release the whey and further solidify the cheese.
- Carefully pour the curds into a strainer lined with cheesecloth.
- Gently squeeze the cheesecloth to filter out as much whey as possible. Be gentle to avoid losing too much curd, as this will help the cheese start to hold together.
Step 5: Mold the Cheese
- Prepare a large plate with a rack and place your 2 faisselle molds on the rack. If you don’t have molds, you can use small colanders or any container with drainage holes.
- Divide the curds evenly between the two molds, pressing down firmly to compact the cheese.
- Sprinkle 1 teaspoon of coarse salt over each cheese, which helps flavor the cheese and draws out additional moisture.
- Place a heavy object on top of each mold to press the cheese, allowing the whey to drain completely and the cheese to become more compact. Use something like a clean can or a small jar filled with water for weight.
- Let the cheese sit like this for 12 hours (overnight). This pressing process firms up the cheese and gives it its final shape.
Step 6: Enjoy Your Fresh Cheese
- After 12 hours, remove the cheese from the molds. The cheese should be firm and have a beautiful, smooth surface.
- Your fresh cheese is now ready to enjoy!
- Serve it as is, or use it in your favorite recipes. It’s perfect on its own, with crackers, on salads, or as a creamy addition to your favorite dishes.
Tips for Perfect Homemade Cheese
- Use Fresh Milk: For best results, use the freshest milk possible. Avoid UHT (ultra-high temperature) treated milk, as it won’t set properly.
- Proper Temperature Control: Maintaining the correct temperatures during heating and cooling is crucial for setting the curds properly.
- Flavor Variations: Customize your cheese by adding herbs, garlic, or cracked pepper during the molding stage for extra flavor.

