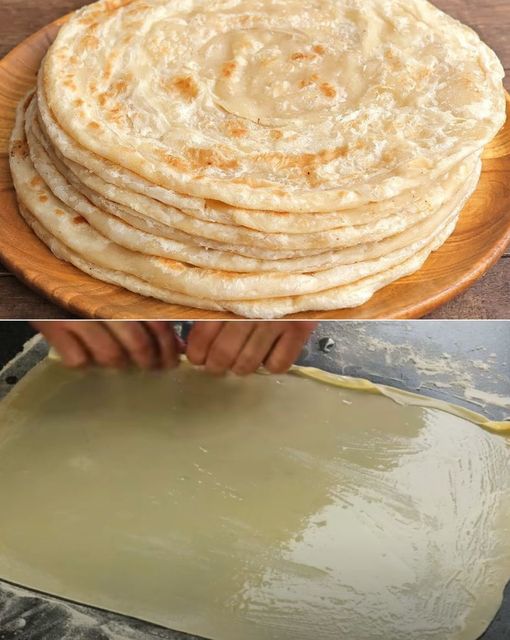
Home Baked Turkish Bread: A Delightful Culinary Journey
Turkish cuisine is renowned for its rich flavors and diverse dishes, and among its many delights, home-baked Turkish bread stands out as a symbol of hospitality and tradition. This bread, known as Bazlama, is a staple in Turkish households, often enjoyed warm with a spread of butter or olive oil. The process of making this bread is as enjoyable as eating it, involving a simple yet meticulous method that has been passed down through generations.
Ingredients
What We Will Need:
- 570 g of all-purpose flour
- 400 ml warm water
- 3 g of sugar (1/2 tsp)
- 100 g of melted butter (3.5 tablespoons)
- 50 ml of vegetable oil (1/5 cup)
- Additional flour for sprinkling the bowl
Step-by-Step Instructions
1. Preparing the Dough
Start by sifting the 570 g of all-purpose flour into a large mixing bowl. This step is crucial as it helps to aerate the flour, making the dough lighter. In a separate bowl, pour 400 ml of warm water, then add 3 g of sugar and a pinch of salt. Stir the mixture until the sugar and salt are completely dissolved.
2. Mixing and Kneading
Gradually add the sifted flour to the water mixture, stirring continuously to ensure there are no lumps. Once the mixture begins to come together, transfer it to a lightly floured surface and start kneading with your palms. Knead the dough for about 10-15 minutes until it becomes smooth and elastic. This step is vital for developing the gluten, which gives the bread its chewy texture.
3. Rising the Dough
Place the kneaded dough back into the bowl and cover it with cling film. Let the dough rise in a warm place for about 15 minutes. This resting period allows the yeast to ferment, giving the bread its characteristic flavor and texture.
4. Shaping the Dough
After the dough has risen, dust a clean surface with flour. Divide the dough into eight equal parts and shape each part into a ball. Place these balls on a floured baking sheet to prevent sticking.
5. Rolling Out the Dough
Using a rolling pin, roll each dough ball into a large square. This step is essential for creating the layers in the bread, which will result in a flakier texture.
6. Preparing the Oil Mixture
In a measuring cup, combine 100 g of melted butter with 50 ml of vegetable oil. Mix well to create a smooth and even consistency. Brush this mixture generously over the rolled-out dough squares.
7. Forming the Snail Shape
Roll each square of dough into a log, then coil the log into a snail shape. Sprinkle each snail-shaped dough with a bit of flour and gently roll it out again with a rolling pin. This unique shaping technique ensures that the bread has a tender and layered texture.
8. Frying the Bread
Heat a large pan over medium heat. Place the rolled-out dough in the pan and brush the top with more of the butter and oil mixture. Fry the bread until it is golden brown on both sides, about 2-3 minutes per side. The bread should puff up slightly and develop a crispy, golden crust.
Serving Suggestions
Serve your home-baked Turkish bread warm, straight from the pan. It pairs wonderfully with a variety of dips and spreads, such as hummus, tzatziki, or simply a drizzle of olive oil and a sprinkle of sea salt. Enjoying this bread fresh ensures that you experience its full flavor and delightful texture.
Conclusion
Baking Turkish bread at home is not just about creating a delicious dish; it’s about embracing a culinary tradition that has been cherished for generations. The simple ingredients and straightforward process make this recipe accessible to everyone, while the rich history and unique techniques add depth and flavor to your baking experience.

