
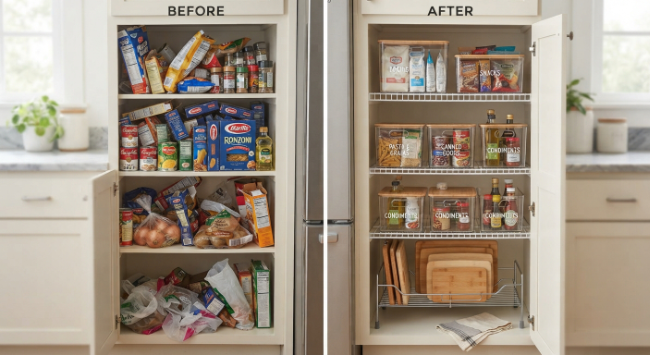
A pantry that is only two feet wide does not need less organization than a walk in one, it needs more precision. When every shelf is doing double or triple duty, a single disorganized bin can throw off the whole system.
Figuring out how to organize a small kitchen pantry is less about buying more storage products and more about making deliberate decisions about what stays, where it lives, and how you will find it again in three weeks. These seven steps are the order I would actually follow in a real small pantry, not a theoretical one.
Step One: Take Everything Out and Sort It Into Piles
Before anything gets reorganized, it all has to come out. Sort items into rough categories as you go: baking, snacks, canned goods, grains and pasta, spices, and anything that does not fit cleanly anywhere else.
This step feels slow, but it is the only way to actually see what you own, including duplicates you forgot about and items pushed to the back that expired a year ago.
Check expiration dates honestly during this pass. It is common to find three half used bags of the same flour or two nearly identical jars of the same spice bought because the first one was buried and forgotten.
Step Two: Toss, Donate, or Consolidate Duplicates
Once everything is sorted, make real decisions. Expired items get discarded. Unopened, unexpired duplicates that you will not realistically use can go to a local food pantry. Also read 5 Rules in Every Safe Meal Prep Storage Guide.
Opened duplicates of the same ingredient, such as two partial bags of rice, get consolidated into one container. In a small pantry, every inch you free up during this step becomes usable space later, so it is worth being honest rather than sentimental about what actually gets used.
Step Three: Group Items Into Zones Based on How You Cook
Instead of organizing alphabetically or by food type in the abstract, group items by how you actually use them. A baking zone keeps flour, sugar, baking powder, and vanilla together.
A breakfast zone keeps cereal, oats, and nut butter within easy reach. A snack zone at a lower, more visible height works well if kids grab their own snacks. This approach matters more in a small pantry than a large one, because there is no room for wandering; you need to reach for what you need in one motion.
Step Four: Use Vertical Space Before Buying New Shelving
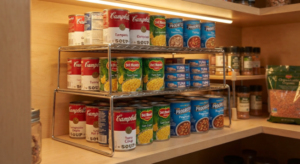
Most small pantries waste vertical space long before they run out of floor space. Stackable shelf risers create a second tier on a single shelf without needing new hardware.
Door mounted racks turn unused cabinet door space into storage for spices or small jars. Look up as well: the top shelf, often ignored because it is hard to reach, is ideal for infrequently used items like holiday baking supplies or backup stock.
Step Five: Choose Containers That Fit Your Actual Shelves
It is tempting to buy a full matching container set before measuring anything, but containers should be chosen after you know your shelf depth and height, not before.
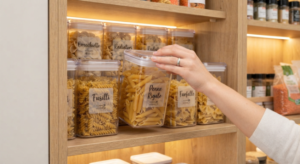
Clear containers make contents visible at a glance, which matters enormously in a small space where you cannot see behind the front row of items. Square or rectangular containers use shelf space more efficiently than round ones, since they eliminate wasted gaps between containers.
Step Six: Label Everything and Build a Rotation Habit
Labeling is not just for looks. When multiple containers hold similar looking dry goods, a label prevents confusion and helps everyone in the household put things back correctly.
Alongside labeling, apply a first in, first out rotation habit: newer purchases go to the back or bottom of a stack, older ones move to the front.
According to UNH Extension’s guidance on stock rotation, using the closest dated products first is the standard method used in commercial kitchens and food pantries to reduce waste and keep food at its best quality, and the same logic scales down easily to a home pantry.
Step Seven: Do a Five Minute Reset Every Week
An organized pantry does not stay organized on its own. Set aside five minutes after your weekly grocery trip to put new items in their zones, straighten anything that has drifted, and do a quick check for anything nearing its use by date.
This small, repeated habit is what separates a pantry that stays organized from one that looks great for two weeks and then slowly reverts.
Real Life Example: How Extension Programs Apply FIFO at Scale
Food rotation is not a home organizing trend; it is a practice borrowed directly from food safety education. Michigan State University Extension’s guidance on the FIFO system recommends that households take inventory of their cupboards, refrigerator, and freezer every few months, discard expired items, and consistently place older stock in front so it gets used first.
This same first in, first out approach is standard practice in restaurants, school cafeterias, and food banks, where large volumes of shelf stable food need a reliable system rather than memory alone.
Applying that same discipline to a home pantry, even a small one with limited shelves, is simply a scaled down version of a method that already works at scale.
Common Mistakes in Small Pantry Organization
The most common mistake is buying storage products before decluttering, which just means organizing clutter more attractively instead of removing it.
A close second is ignoring vertical space and assuming a small pantry has hit its limit when half the height above eye level is empty. Another frequent issue is over categorizing, creating so many narrow zones that nothing has an obvious home and items end up wherever there is space.
Conclusion
Learning how to organize a small kitchen pantry is really a sequence of small, deliberate decisions rather than one big overhaul.
Sort honestly, consolidate what is duplicated, build zones that match how you actually cook, use the vertical space you already have, choose containers that fit your real shelves, label consistently, and protect the system with a short weekly reset.
Do these seven steps in order, and a cramped pantry stops feeling like a daily obstacle and starts working the way it should.
Frequently Asked Questions
What is the first step in organizing a small kitchen pantry?
Take everything out and sort it into rough categories. You cannot organize what you cannot see, and this step reveals duplicates, expired items, and how much space you actually have to work with.
How do I organize a pantry with very limited shelf space?
Focus on vertical space first, using stackable risers and door mounted racks before assuming you need a bigger pantry. Group items into zones based on how you cook rather than spreading everything evenly.
Do I need to buy matching containers to organize a small pantry?
No. Matching containers help with visibility and consistency, but the more important factor is choosing containers that actually fit your shelf dimensions. Measure first, buy second.
How often should I reorganize my pantry?
A full sort and declutter every few months is reasonable, paired with a five minute weekly reset to keep new groceries in their zones and catch items nearing their use by date.
What does first in, first out mean for pantry organization?
It means placing newer purchases behind or below older stock so the oldest items get used first, reducing the chance that food is forgotten and wasted at the back of a shelf.
Is pantry organization only about aesthetics?
No. While a tidy pantry looks better, the real value is functional: less wasted food, faster meal preparation, and fewer duplicate purchases because you can actually see what you already have.
Should snacks be stored at a specific height in a small pantry?
If children or other household members grab their own snacks, storing them at a lower, easily visible height reduces mess and makes the system easier for everyone to maintain.